
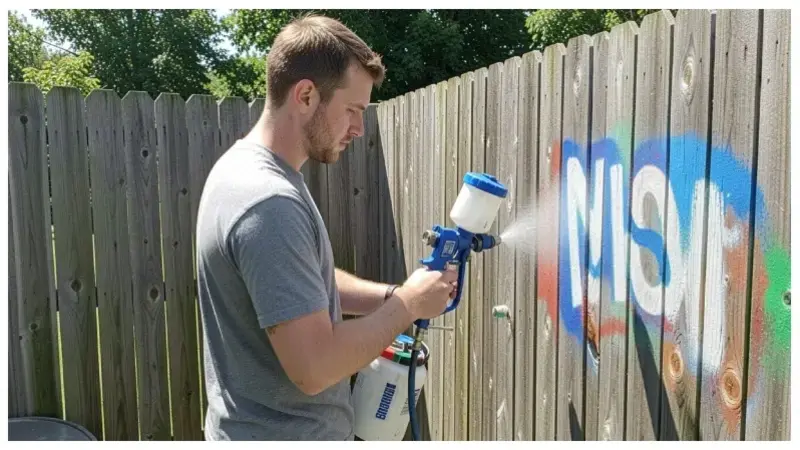
Stepping up to a graco x7 paint sprayer usually means the projects have gotten bigger, and so has the cost of getting the first job wrong. A botched setup on a small fence is an annoyance. A botched setup on a full two-story exterior is a wasted weekend and a lot of wasted paint. This is a setup walkthrough built specifically around avoiding the mistakes that show up most often on a first X7 job—so the extra power you paid for actually works in your favor from day one.
Before the Paint Goes In: Prep the Machine
- Inspect the pump and gun for any residual Pump Armor or storage fluid from the factory or previous storage — flush briefly with water first if the unit hasn’t been used recently
- Confirm the correct tip is installed for the coating you’re using; the X7 supports up to a 0.017″ tip, often the right call for exterior latex but oversized for interior trim work
- Check the hose connections are fully seated — a loose connection is the most common cause of a sudden pressure drop mid-job
- Have the cart on level, stable ground near the work area before you start, not mid-driveway where you’ll be repositioning constantly
Priming: Where Most First Jobs Go Wrong
Priming an X7 isn’t complicated, but rushing it is the single most common cause of a frustrating first hour. Run PushPrime until the fluid coming through is completely smooth and free of air bubbles—not just “looks okay.” Trapped air in the line shows up later as pressure surges and an inconsistent pattern, and it’s much easier to fix during priming than to diagnose mid-wall.
Once primed, do a test spray on cardboard or scrap material before touching the actual surface. This takes two minutes and catches tip issues, pressure problems, or pattern inconsistencies before they end up on the house instead of the test board.
Dialing In Pressure for the Job at Hand
The X7’s higher flow rate compared to smaller sprayers means the pressure settings that felt right on an entry-level machine will often be too aggressive here. Start low. Increase gradually while watching the fan pattern on your test surface—tails at the edges of the pattern mean pressure is still too low; heavy overspray and a hazy mist mean it’s too high. The right setting sits between those two, and it shifts depending on coating thickness, so re-check it any time you switch to a different product mid-job.
Technique for Full Exteriors
- Keep the gun roughly 12 inches from the surface and maintain that distance consistently — moving closer and farther through a pass is what creates visible banding
- Overlap each pass by about 50% to avoid thin stripes between passes
- Work top to bottom on vertical surfaces like siding to catch drips before they set
- On larger walls, work in sections rather than trying to maintain one continuous pass across the whole surface
- Re-prime if the machine sits idle for more than 15–20 minutes, such as during a paint or material change
- Tip mismatch — using a small interior-scale tip on a thick exterior coating strains the pump and produces poor atomization; match tip size to material thickness
- Skipping the test spray — a two-minute check on cardboard prevents discovering a pattern problem halfway across a wall
- Letting the hose kink — this restricts flow and causes intermittent pressure drops that look like a pump problem but aren’t
- Not straining coating before spraying — debris in the paint is one of the most common causes of tip clogs on a first job
End-of-Job Cleanup
The same PowerFlush process used on smaller Graco sprayers applies here—connect a garden hose, flush until the water runs clear, and don’t stop early because it “looks close enough.” On a full exterior job, the machine may have run for several hours, and thorough flushing matters more, not less, after extended use. Don’t overlook the gun filter and inlet strainer, as a full day of spraying can send a large amount of material through these components.
Setting Up for the Next Job
A well-executed first job on an X7 tends to set the tone for how the machine performs going forward. Getting priming, tip selection, and pressure right the first time—rather than fighting through trial and error mid-project—is what separates a smooth exterior repaint from a frustrating one. When it’s time to restock wear parts, keeping the graco magnum x7 parts page bookmarked means the next filter or tip swap takes minutes, not a delayed job.
Frequently Asked Questions
How long should priming take on a first job?
There’s no fixed time—prime until the fluid runs completely smooth and air-free, which sometimes takes longer than expected on a brand-new or long-stored unit.
What tip size should a first-time X7 user start with?
For general exterior latex, a mid-range tip in the 0.015″–0.017″ range is a reasonable starting point; always check the coating manufacturer’s guidance for specifics.
Why does the spray pattern change partway through a job?
This is usually either a partially clogged tip or filter or trapped air from an incomplete re-prime after a pause. Both are quick fixes once identified.
Is a test spray really necessary if I’ve used sprayers before?
Yes — tip wear, coating thickness, and pressure settings vary enough between jobs that a quick test on scrap material is worth the two minutes it costs.